In a worksheet that needs more than one page to print, you might want a title row (or rows) to print at the top of every page of your data in Excel.
Print column headers at the top of every page
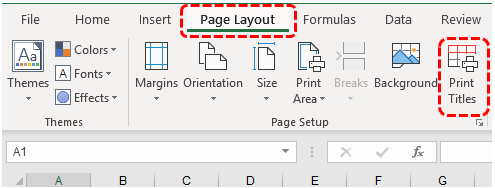
(1) On the “Page Layout” tab go to “Page Setup” group and click “Print Titles”

Note:
If the “Print Titles” button is locked (greyed out), it may be because you are currently editing a cell / chart or if you do not have a printer set up in Windows.
If the “Rows to repeat at top” spreadsheet icon is locked (greyed out), it may be because you have more than one worksheet selected within your workbook.
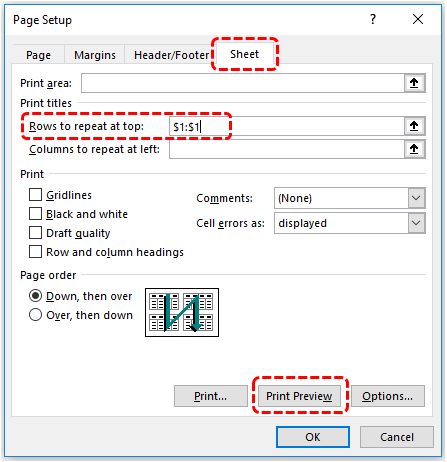
(2) On the “Sheet” tab, go to “Rows to repeat at top” box and select the Row or type the Row Reference (“$1:$1” shown in the image below)
You may click and select the row or rows you want to display at the top of every page and then click on “Print Preview” to see how the document will look like.
If its fine, click OK.

Note:
To print two header rows, type “$1:$2”. To print the top three rows, enter “$1:$3”.
Print row headers at the left of every page
(1) First step of the previous section
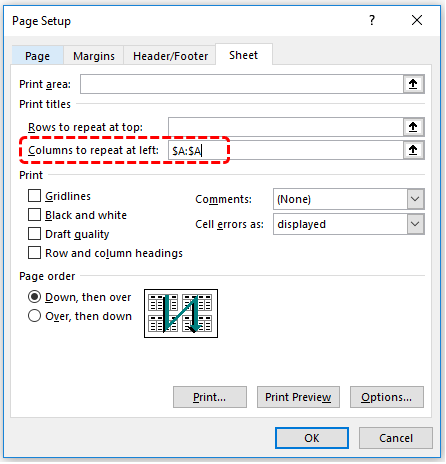
(2) If you want to display any column(s) at the left of every page, you may select the column(s) or type the column reference

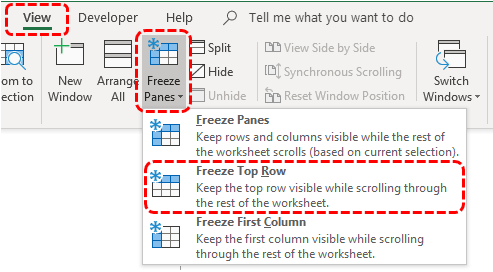
Freeze Top Row (Only Display)
If you want column headings to remain at the top of your sheet when scrolling within a spreadsheet, you will need to freeze the top row.

To cancel a selection of multiple worksheets, click any unselected worksheet. If no unselected sheet is visible, right-click the tab of a selected sheet, and then click Ungroup Sheets on the shortcut menu.
You must be logged in to post a comment.