When you work on a spreadsheet, many a times you need to use some formulas. An Excel formula is easy to create and edit and I am sure all of you are well versed with it. You can easily edit it through the formula bar or directly in the cell.
LOCK and PROTECT Cells Containing Formulas

But you may not want other users to change, edit or delete your formulas. At times, even you yourself may accidentally mess them up. Now if this happens, you might be lucky to trace and correct it. But if you’re not able to, you may end up wasting time and effort in recreating all of it. The probability of such errors increases a lot when you share a file with your colleagues, bosses or clients.
Several corporates have lost millions due to spreadsheet disasters
One way to prevent this is to lock all the cells in the worksheet. But this way the user will not be able to make any changes at all. For instance, if you need inputs on the spreadsheet from someone or you have to get it reviewed by your manager, you may have to allow him to add comments or highlight cells as part of his feedback.
So a better way to deal with this problem is to lock only formulas in the spreadsheet. Now again if there are formulas in several cells and are scattered all over, it may be time consuming to look for cells containing formulas.
Video at the end
This article shows you a fast and easy way of protecting all your formulas in the worksheet at one go.
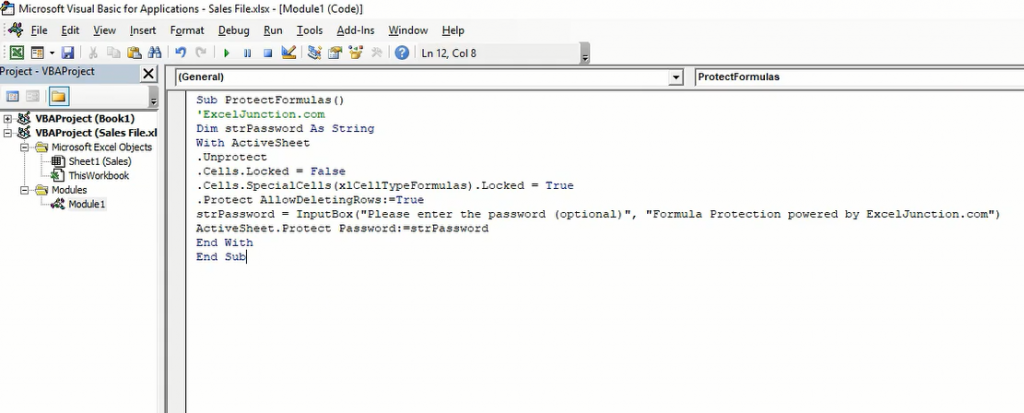
Below is a VBA code that’ll help us achieve this and it would not take more than a few seconds. Even those who are not acquainted with VBA can easily get this done by simply following the steps on how to use this code:
CODE
Sub ProtectFormulas()
‘ExcelJunction.com
Dim strPassword As String
With ActiveSheet
.Unprotect
.Cells.Locked = False
.Cells.SpecialCells(xlCellTypeFormulas).Locked = True
.Protect AllowDeletingRows:=True
strPassword = InputBox(“Please enter the password (optional)”, “Formula Protection powered by ExcelJunction.com”)
ActiveSheet.Protect Password:=strPassword
End With
End Sub
How to Use this Code?
Here are the steps to use this code:
- (1) Open an Excel workbook. We’ll open one where we already have a lot of formulas.

- (2) Go to Developer tab and click on Visual Basic or alternatively Press ALT + F11. This will open the Visual Basic Editor.

- (3) Now in the VB Editor menu go to Insert and click on Module. This will insert a module for the workbook with a blank code window.

- (4) Now simply copy and paste our VBA code into this code window.

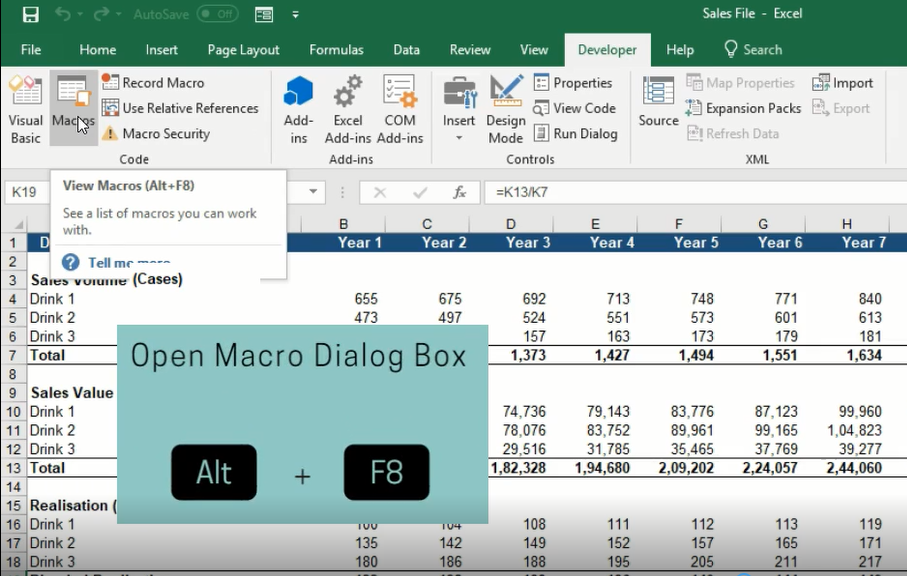
- (5) Move back to the worksheet. To execute the code, go to developer tab and click on Macro. Alternatively Press Alt + F8 on your keyboard. The “Macro” dialog box will open. Click on “Run”

- (6) This will activate the code and Formula Protection Input box will prompt you for a password. Enter a password and make sure you remember it. You may even proceed without a password and still the code will protect your formulas. But this will be limited protection as anyone may easily get access to change formulas by unprotecting the worksheet without entering any password. However, if you have a password protection, then any changes to formulas would be allowed only once the password is entered correctly.


- (7) Now that we have activated the code, lets try making changes to the cells containing formulas. So you see that changes cant be made now. Hence the code did its job well and the sheet is now protected from accidents.

- (8) If you want to make any changes willingly, simply “Unprotect” the worksheet from the Review tab. You shall be prompted for the password. Enter it and you’ll be able to make changes to all cells now. To re-protect, simply run the macro again and repeat the process.

- (9) Now save the Workbook and you are done. Just remember that it needs to be saved as an “Excel Macro-Enabled Workbook (*.xlsm)” for formula protection vba code to work.


test